Flat netting
Back to net & rope index
Practice
If you can afford it, practice before making the net you want. Braid flat netting 12 meshes wide and as long as needed to perfect your skills.
Otherwise you will have to be content with a ragged-looking net. Fortunately, the fish are unlikely to criticize your beginning attempts.

You need a strong foundation line, stretched taut between 2 posts or similar. The thickness of this foundation line should be enough for easy tying of clove hitches, but no thicker. (Therefore the thicker the netting twine, the thicker the foundation line.)

First row of half-meshes

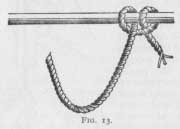
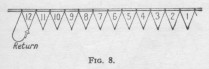
On this foundation line tie a "round" (row) of 12 loops or half-meshes (Fig 8) with (12 + 1) clove hitches (Fig 13), working from right to left. Clove hitches are used only for tying to the foundation line. All lower knotting is with sheet bends.

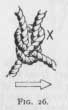
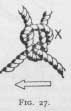
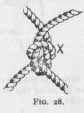
For sheet bends see Fig 26, 27. Working from right to left, with the needle in your right hand, will help you follow the diagrams. The 3rd row should be done with the needle in the other hand, and doing the sheetbends as in a mirror-image of the diagrams. (Persevere: using both hands in everything develops both sides of your brain and thus increases your intelligence.)

Second row of meshes; first row of full meshes.

The second row is tied at the tips of the loops of the preceding round of half-meshes. This row completes the 1st series of 12 full meshes.

Second row of meshes; first row of full meshes.
Loading needles
Loading the needle
Instructions:
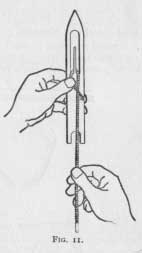
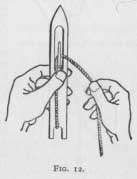
Loading the needle


To fill the second type of needle simply lead the twine around and round, passing between the prongs at each end, until the needle is full.
Flat netting - Method 1
Clove-hitch Flat netting - Method 1:
  • load your needle
  • erect your foundation line
  • at the right end of the foundation line, using your needle, 'sew' a clove-hitch (Fig 13) like this:
Beginning hitch
  • from the needle, unwind about 300mm of twine which is then held in the left hand between index finger and thumb, about a hand length from the free end
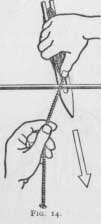
  • pass the needle away from you, over the line and down underneath it until the needle reaches a position opposite the front of the left hand (Fig 14)
  • Looping underneath
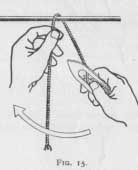
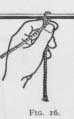
  • draw the needle towards you and upwards in the direction of the left shoulder (Fig 15) until the left hand (which keeps a non-slip grip on the twine) is brought up close to the foundation line where it will be possible to grip the 2 arts of the netting-twine between the 1st finger and thumb of the left hand, thus forming a tight loop or half-hitch over the foundation line (Fig 16).
  • Half-hitch  
    Full-hitch
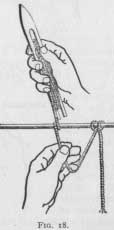
  • with the twine held firmly in the left hand, the needle is now carried away from you, over the line again, and then towards you, and underneath it, at the back of the left hand.
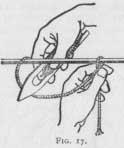
  • this gives a loop at the back of the left-hand thru which you now pass the needle to complete the clove-hitch (Fig 17).
  • pull the knot tight. (Fig 13)

  • Next step:

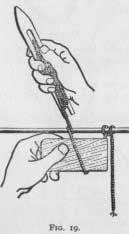
    2nd clove-hitch, using fingers 2nd clove-hitch, using gauge


    Beginning 2nd row The 2nd row, this time of full-meshes, is done from left to right, using sheet-bends on the tips of the loops of the 1st row:
    • hold the gauge in the left hand a little way below loop 12, that is, the last half-mesh of Round 1.
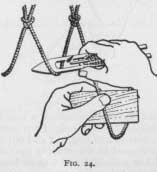
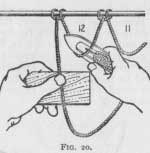
    • bring the needle down in front of it, up behind it, and then up thru the loop , from the far side towards you (Fig 20)
    First sheet-bend
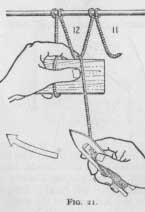
  • pull the needle strongly towards you until the upper edge of the gauge is brought hard up against the tip of the loop (Fig 21)
  • Directions for the sheet-bend
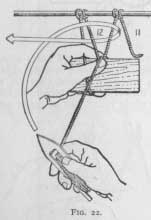
  • where the twine comes forward over the edge of the gauge grip it and the tip of loop 12 firmly between the thumb and 1st finger of the left-hand and hold them securely in that position pressed tightly against the upper edge of the gauge (Fig 22)
  • with a clockwise swing of the right-hand, indicated by the arrow ribbon in Fig 22, cause the working part of the twine, that is, the part between the gauge and the needle, to form a loop lying above and to the left of the left-hand.
  • Completing the sheet-bend
    Completing the sheet-bend
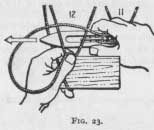
  • pass the needle behind both bars of the half-mesh 12 and out thru the loop already formed in the working part of the twine (Fig 23)
  • pull snug the knot tightly to complete the sheet bend (Fig 26)
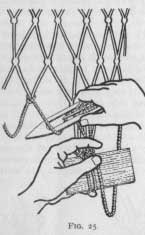
  • Repeat on each loop of the 1st row, sliding the gauge towards the right without removing from the loop till the end of the row is reached.

  • Round 3:


    Making it easier
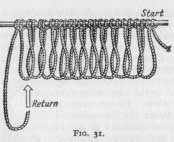
    In practice, when setting up a net on a stretched foundation line, the clove-hitches are made close together and the first round appears as in Fig 31.


    With partially closed loops thus formed it is easier to get an even pull on the twine when forming the knots of the next round and a more uniform result is obtained.

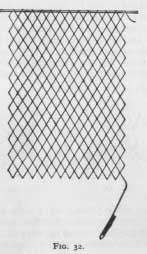
    On completion of the first few rounds many workers remove the foundation line. The clove-hitches then disapear and the first row of half-mehses is set free.They are then rove onto another line (Fig 32), or on to a rod, and braiding continued in the usual way.
    With the disappearance of the clove-hitches the half-meshes in the original round become slightly enlarged. This is generally of no importance. If, however, it should be essential to keep the first row of half-meshes exactly the same size as those in the remainder of the net, allowance muct be made for this in setting up.

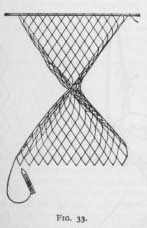
    After sufficient length of net has been made (Fig 32) it can be turned over after every round and worked continuously from left to right without changing sides (Fig 33).


    Flat netting - Method 2
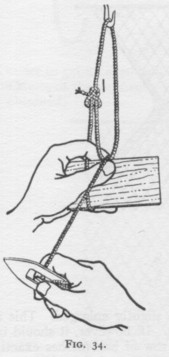
    Some netmakers prefer the advantages of the chaining-out method to the foundation-line:
    Flat netting - Method 3


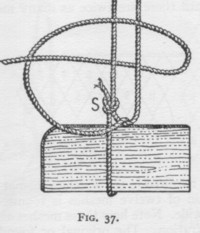
     Foundation loop:
    Back to net & rope index